Objective
This activity introduces students to the basic principles of cutting a keyway on a shaft using a milling machine. Students will learn to properly mount the shaft using a V-block, align the cutter, and perform keyway milling to specified depth and width. The operation emphasizes alignment accuracy, depth control, and tool engagement management.
Materials and Equipment
The following materials and tools are essential for successfully completing this activity. Ensure they are available, complete, and in proper working condition before starting.
- Shaft with Threaded End (from previous activity)
- Keyway Cutter or End Mill
- Vertical Milling Machine
- V-block with Clamp
- Vernier Caliper
- Steel Rule
- Safety Goggles
- Center Finder
Procedure
Setup and Mounting
- Clean the shaft and securely mount it onto a V-block on the milling machine table.
- Clamp the shaft firmly to prevent any movement during the milling process (see Figure 10.1a).
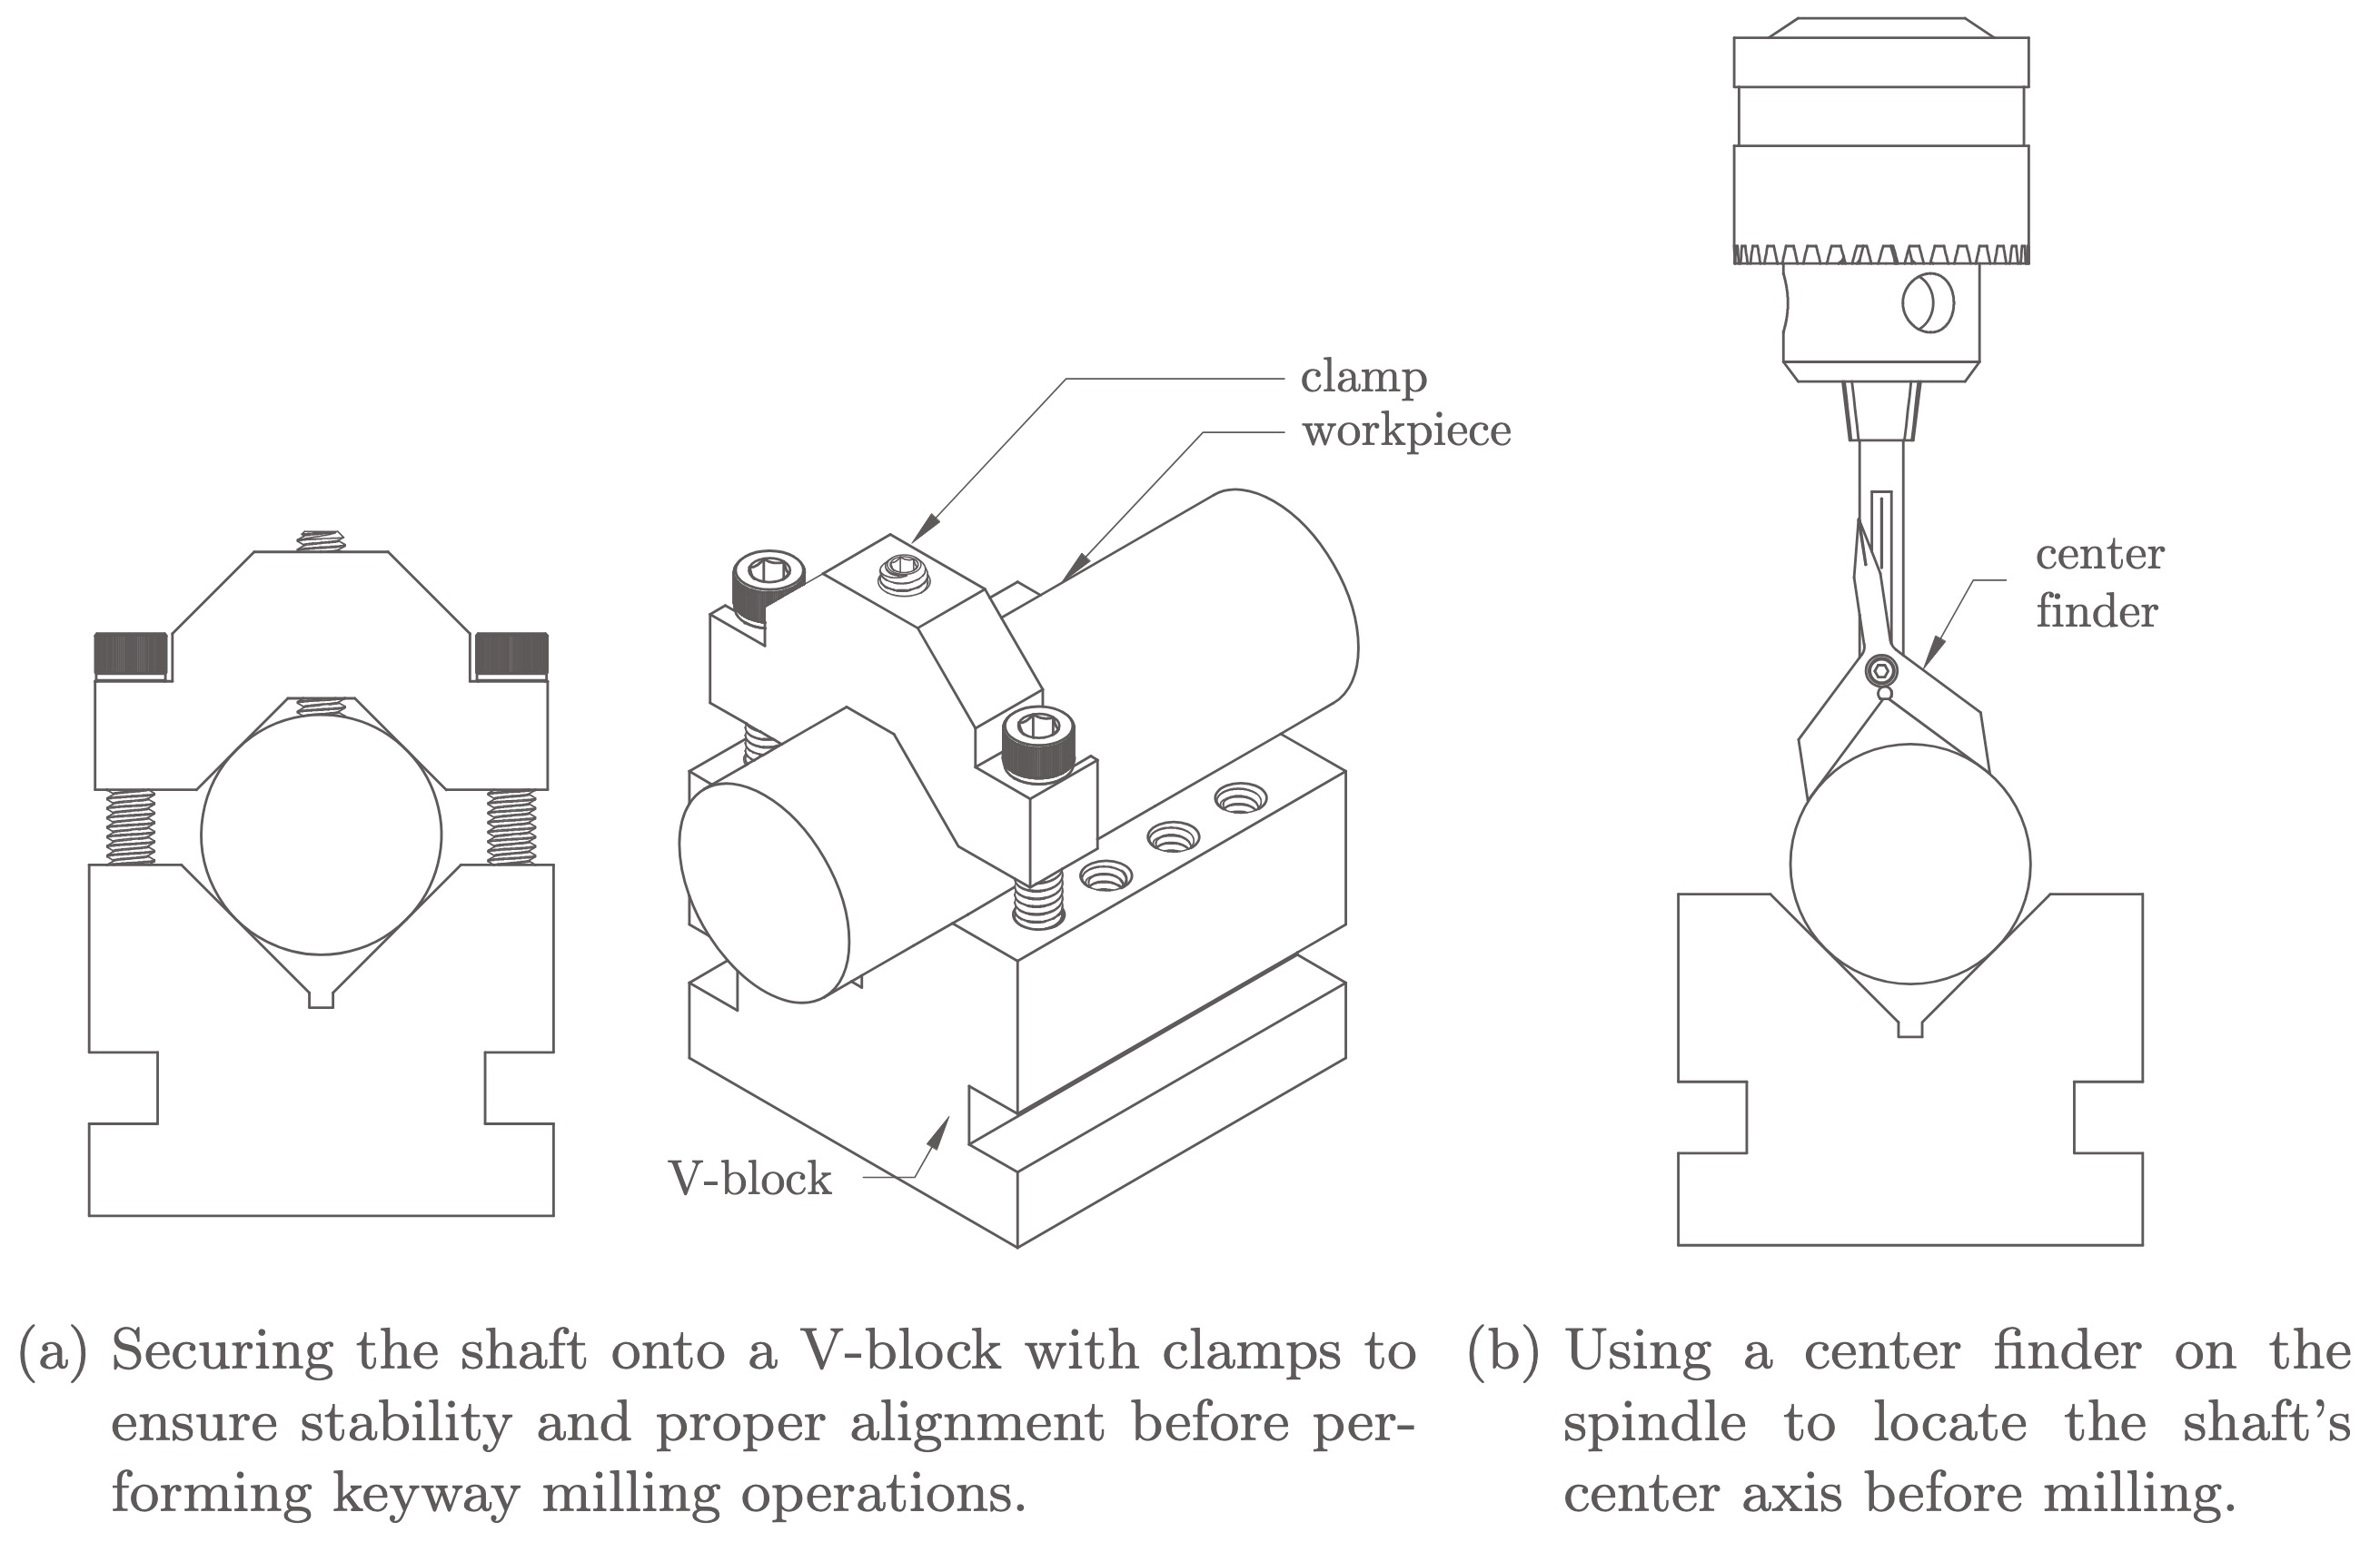
Figure 10.1: Setup and alignment of the shaft for keyway cutting using a V-block and center finder.
Locating the Center
- Attach a center finder to the spindle and carefully locate the central axis of the shaft (see Figure 10.1b).
- Zero the machine axes and align the spindle directly above the intended keyway position.
Cutting the Keyway
- Without changing the spindle position, replace the center finder with the appropriate end mill.
- Lower the cutter until it just touches the shaft surface, then zero the depth gauge.
- Set the milling machine to an appropriate spindle speed and feed rate.
- Initiate the cut with a shallow depth of cut to begin establishing the keyway.
- After each pass, incrementally increase the depth, ensuring proper chip removal and avoiding tool overload.
- Continue milling until the desired keyway width and depth are reached, based on the design specification.
Finishing and Cleanup
- Once machining is complete, retract the cutter and carefully remove the shaft from the fixture.
- Deburr the keyway edges using a fine file or abrasive paper to remove any sharp burrs.
- Perform a final visual inspection and dimensional verification of the keyway against the specification.