Objective
This final activity ensures that all machined components (the shaft, flanges, and key) are assembled and tested for functional fit. Students will evaluate the alignment, dimensional compatibility, and mechanical integrity of the keyed mandrel. The goal is to validate the success of the individual machining operations and reflect on the tolerance requirements in precision mechanical assemblies.
Materials and Equipment
The following materials and tools are essential for successfully completing this activity. Ensure they are available, complete, and in proper working condition before starting.
- Shaft with Keyway
- Two Flanges with Keyways
- Finished Key
- Vernier Caliper or Micrometer
- Sandpaper
Procedure
Dry Assembly
- Clean all components thoroughly to remove chips, burrs, and oil residues.
- Insert the key into the shaft's keyway. It should seat fully and snugly without requiring force.
- Slide the first flange onto the shaft, aligning its keyway with the key.
- Repeat the process with the second flange, ensuring proper orientation.
- Secure the assembly by tightening the nut against the second flange (see Figure 5.1).
- If the fit is slightly tight, avoid forcing the parts together. Use light sanding or polishing to improve the fit.
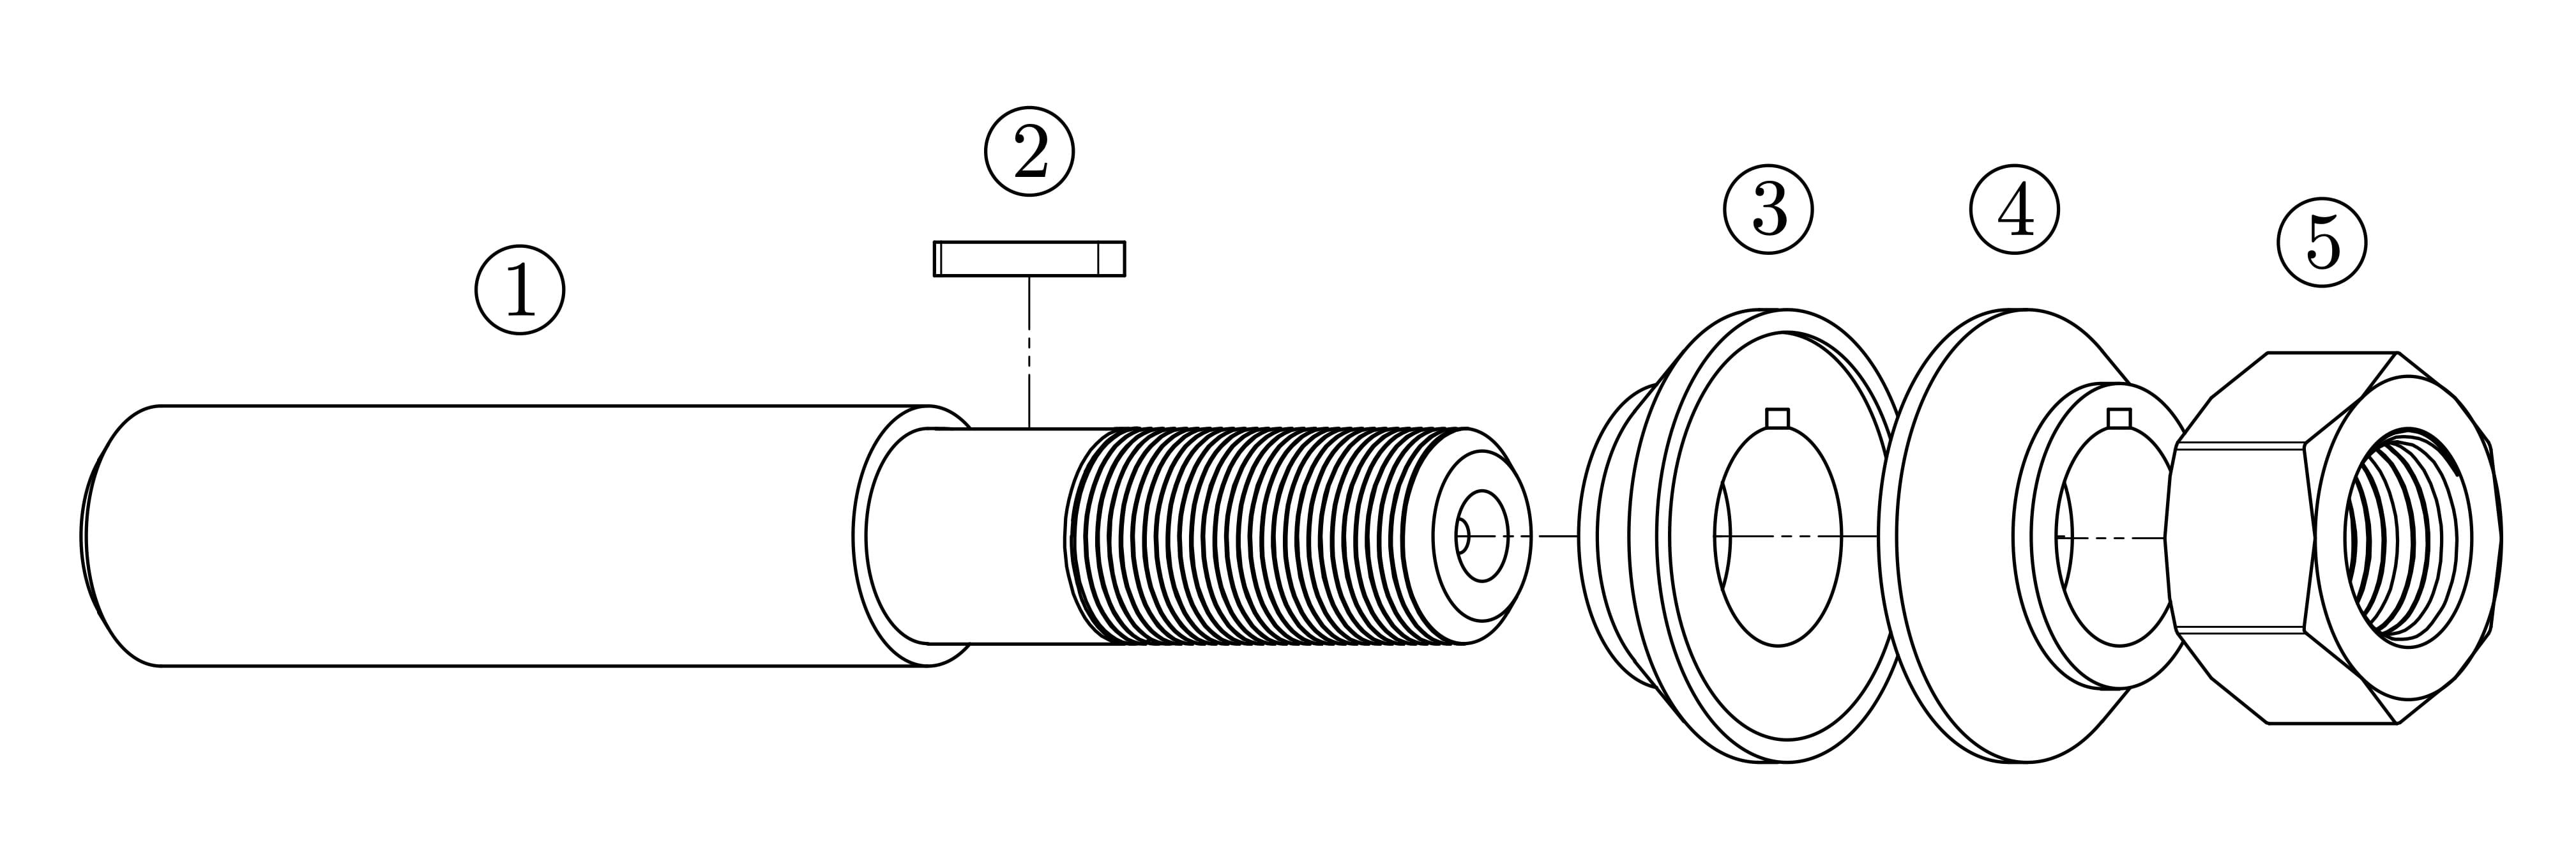
Figure 12.1: Performing dry assembly of the keyed mandrel to evaluate fit and alignment before final use.
Fit Evaluation
- Visually inspect for misalignment or gaps between mating surfaces.
- Rotate the flanges gently to check for axial play or tightness.
- Measure the overall length and concentricity of the assembled mandrel.
- Confirm that the flanges are symmetrical and that the key is fully seated.
Final Check and Reflection
- Evaluate whether the overall fit falls within acceptable tolerances.
- If necessary, disassemble and lightly polish or deburr any interfering parts.
- Record your observations and note any modifications made during test fitting.