Objective
This activity aims to develop precision turning skills using a center-to-center setup. Students will learn to align the lathe centers, properly mount the workpiece with a lathe dog, and perform controlled turning to achieve a target diameter. The focus will be on using the crossfeed dial for consistent material removal, maintaining a reference diameter, and executing a final finishing cut to meet dimensional specifications.
Materials and Equipment
The following materials and tools are essential for successfully completing this activity. Ensure they are available, complete, and in proper working condition before starting.
- Workpiece
- HSS or Turning Tool
- Safety Goggles
- Vernier Caliper
- Lathe Machine
- Drive Plate
- Lathe Dog
- $60\degg$ Dead Center
- $60\degg$ Live Center
- Chuck Key
- Tool Post Key / Allen Wrench %(depending on the machine)
Procedure
Lathe Setup and Workpiece Mounting
- Attach the drive plate to the lathe spindle.
- Insert a $60\degg$ dead center into the drive plate and a $60\degg$ live center into the tailstock.
- Ensure that the dead center is aligned with the spindle center. If misaligned, lightly cut the dead center surface to maintain the $60\degg$ angle.
- Approximately check the alignment of the lathe centers by bringing the tailstock center close to the spindle center without a workpiece in between (see Figure 4.1a).
- If the centers are misaligned, use the set over screws on the tailstock to align it with the dead center (see Figure 4.1b).
- Secure the workpiece by attaching a lathe dog, ensuring that it fits properly onto the drive plate.
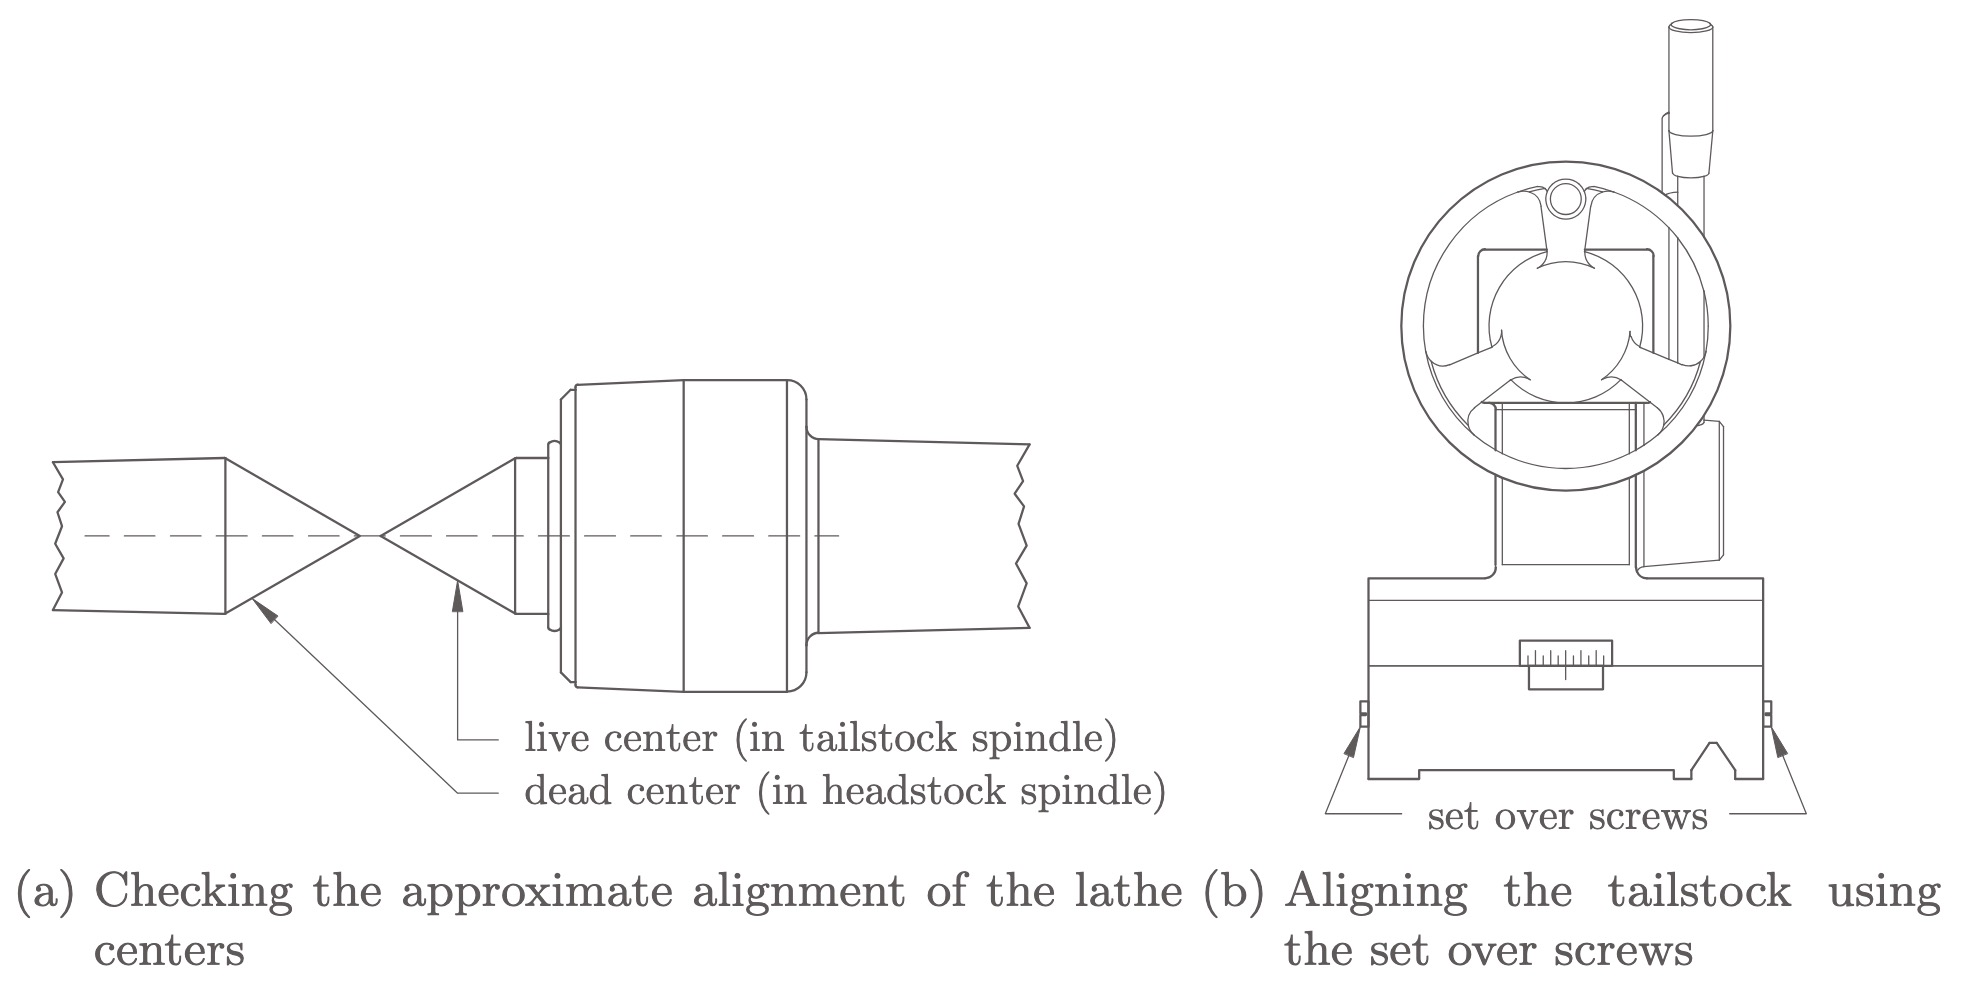
Figure 4.1: Aligning the lathe centers before mounting the workpiece.
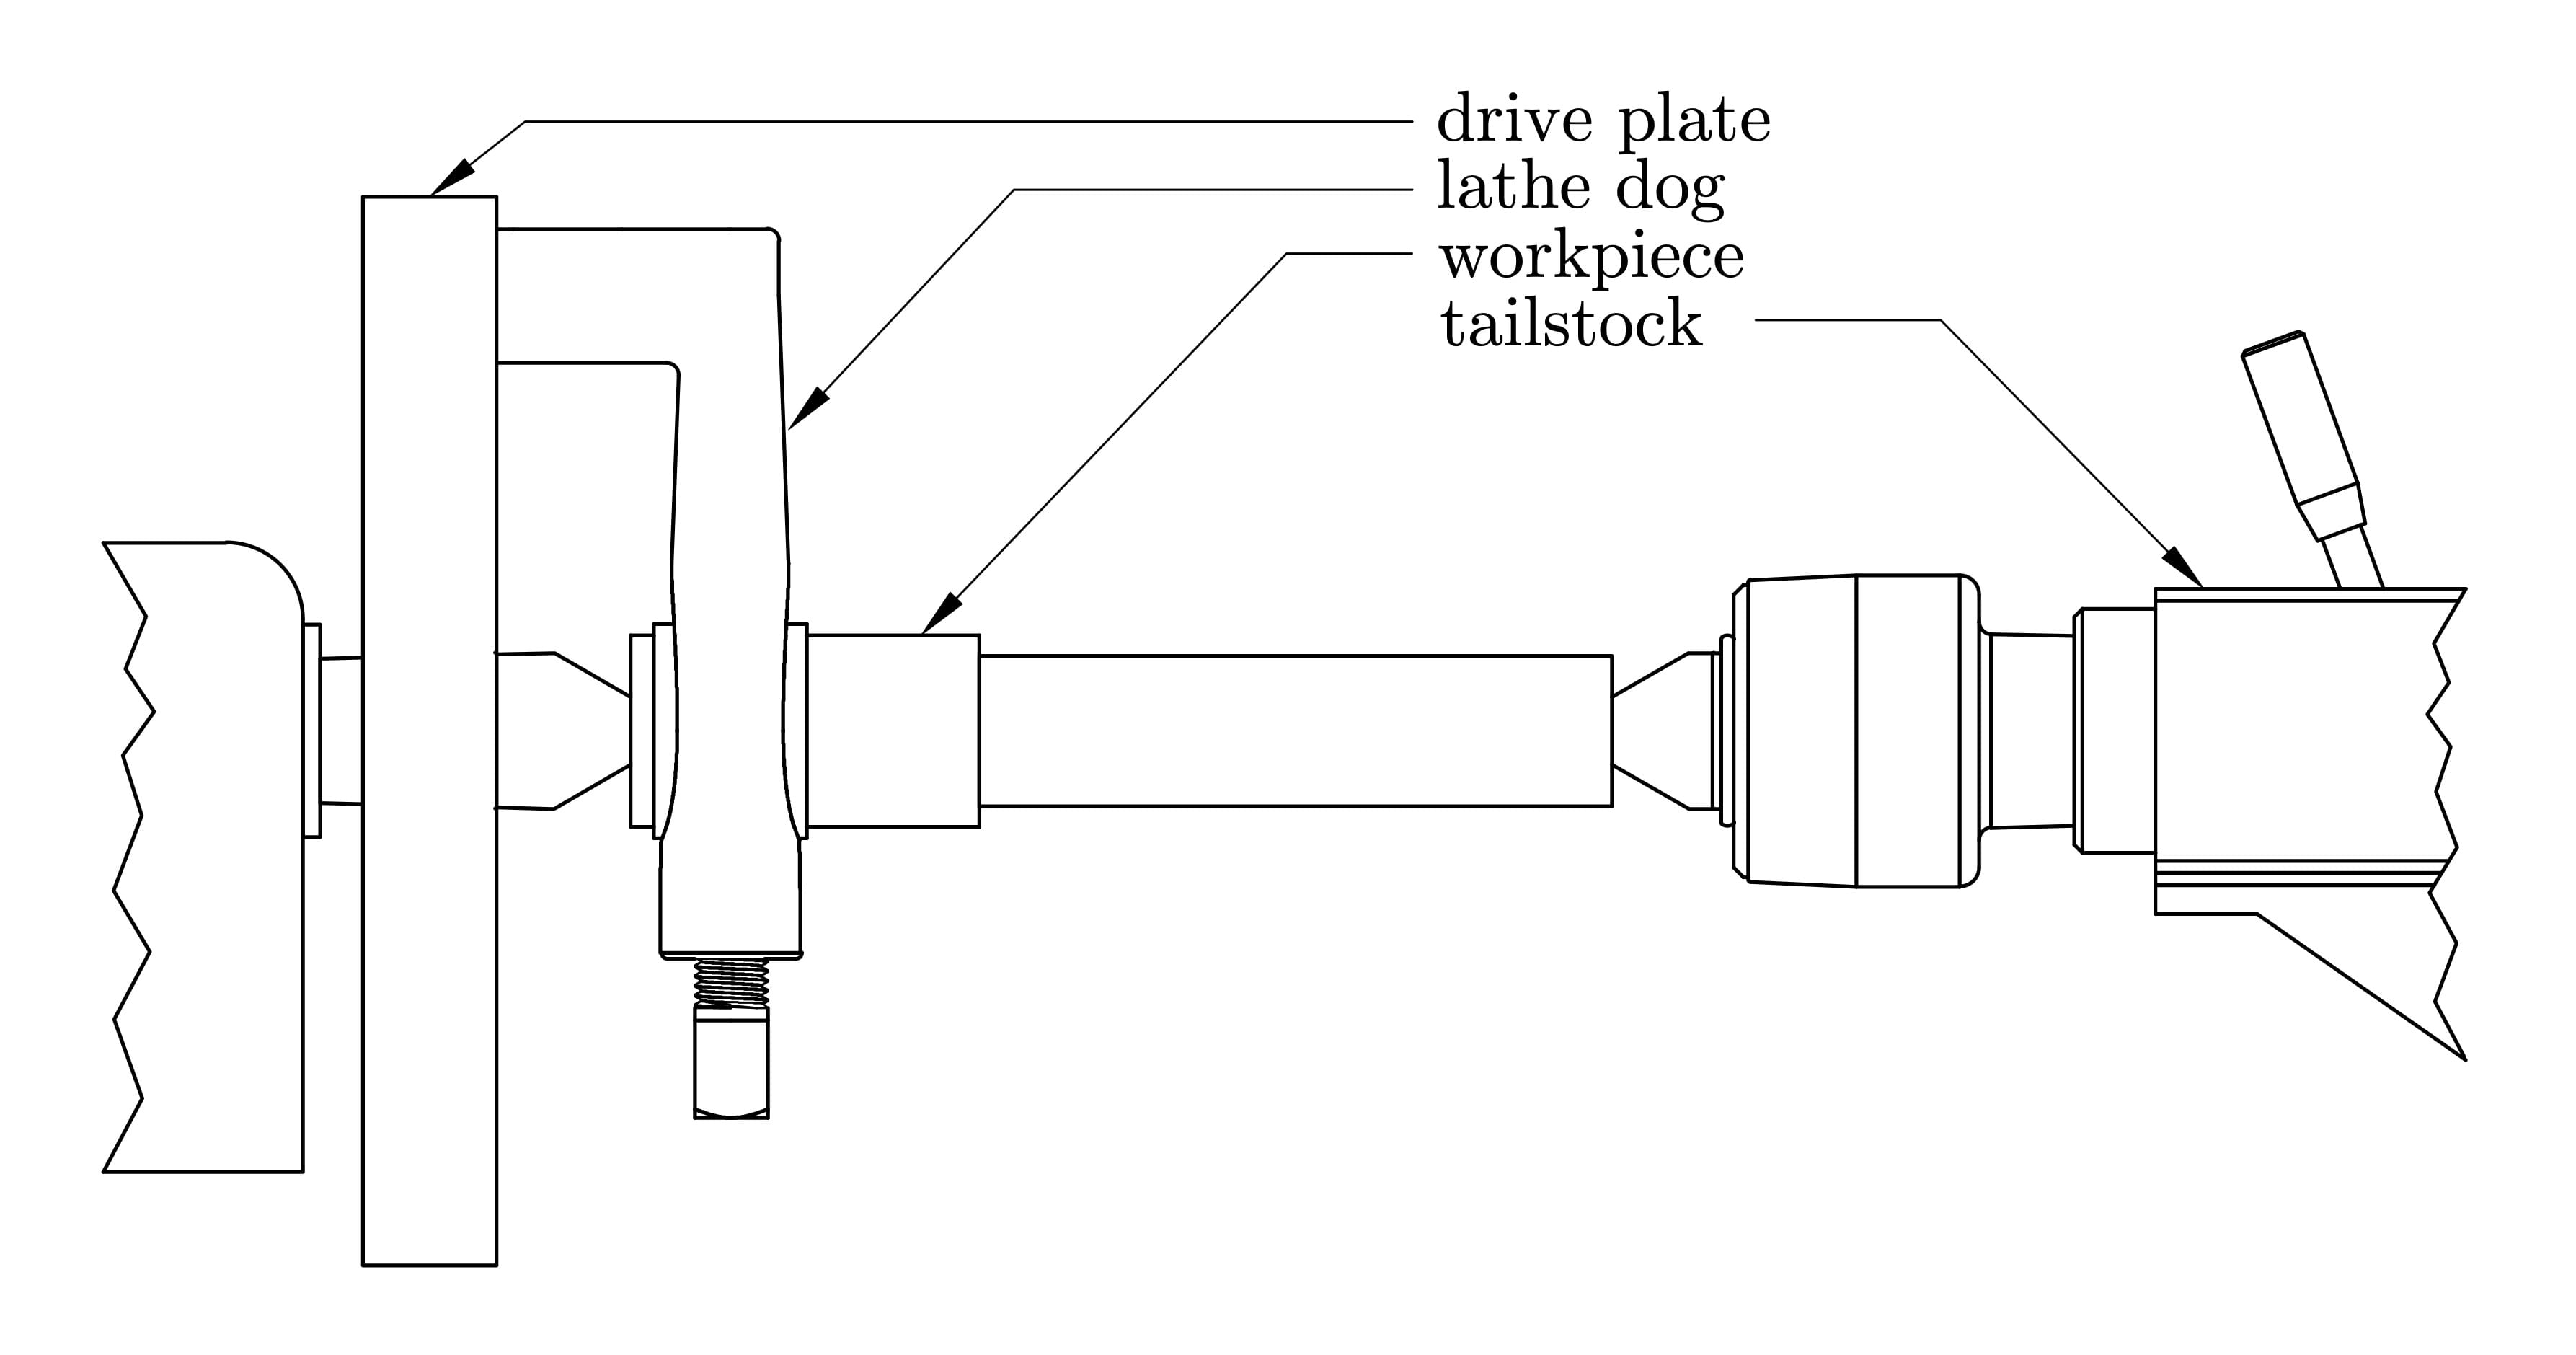
Figure 4.2: Lathe setup showing the drive plate, lathe dog, and workpiece mounted between centers.
Initial Turning to Uniformity
- Zero the crossfeed dial. This will serve as the reference for all depth cuts. Do not reset this reference point throughout the operation.
- Begin rough turning to achieve a uniform diameter along the entire length of the workpiece.
- Observe and record the dial readings after each cut to track material removal accurately.
- Using a vernier caliper, measure the workpiece diameter after rough turning. This will be your reference diameter.
- Note that if your centers are aligned, straight turning will produce a uniform diameter (see Figure 4.3).
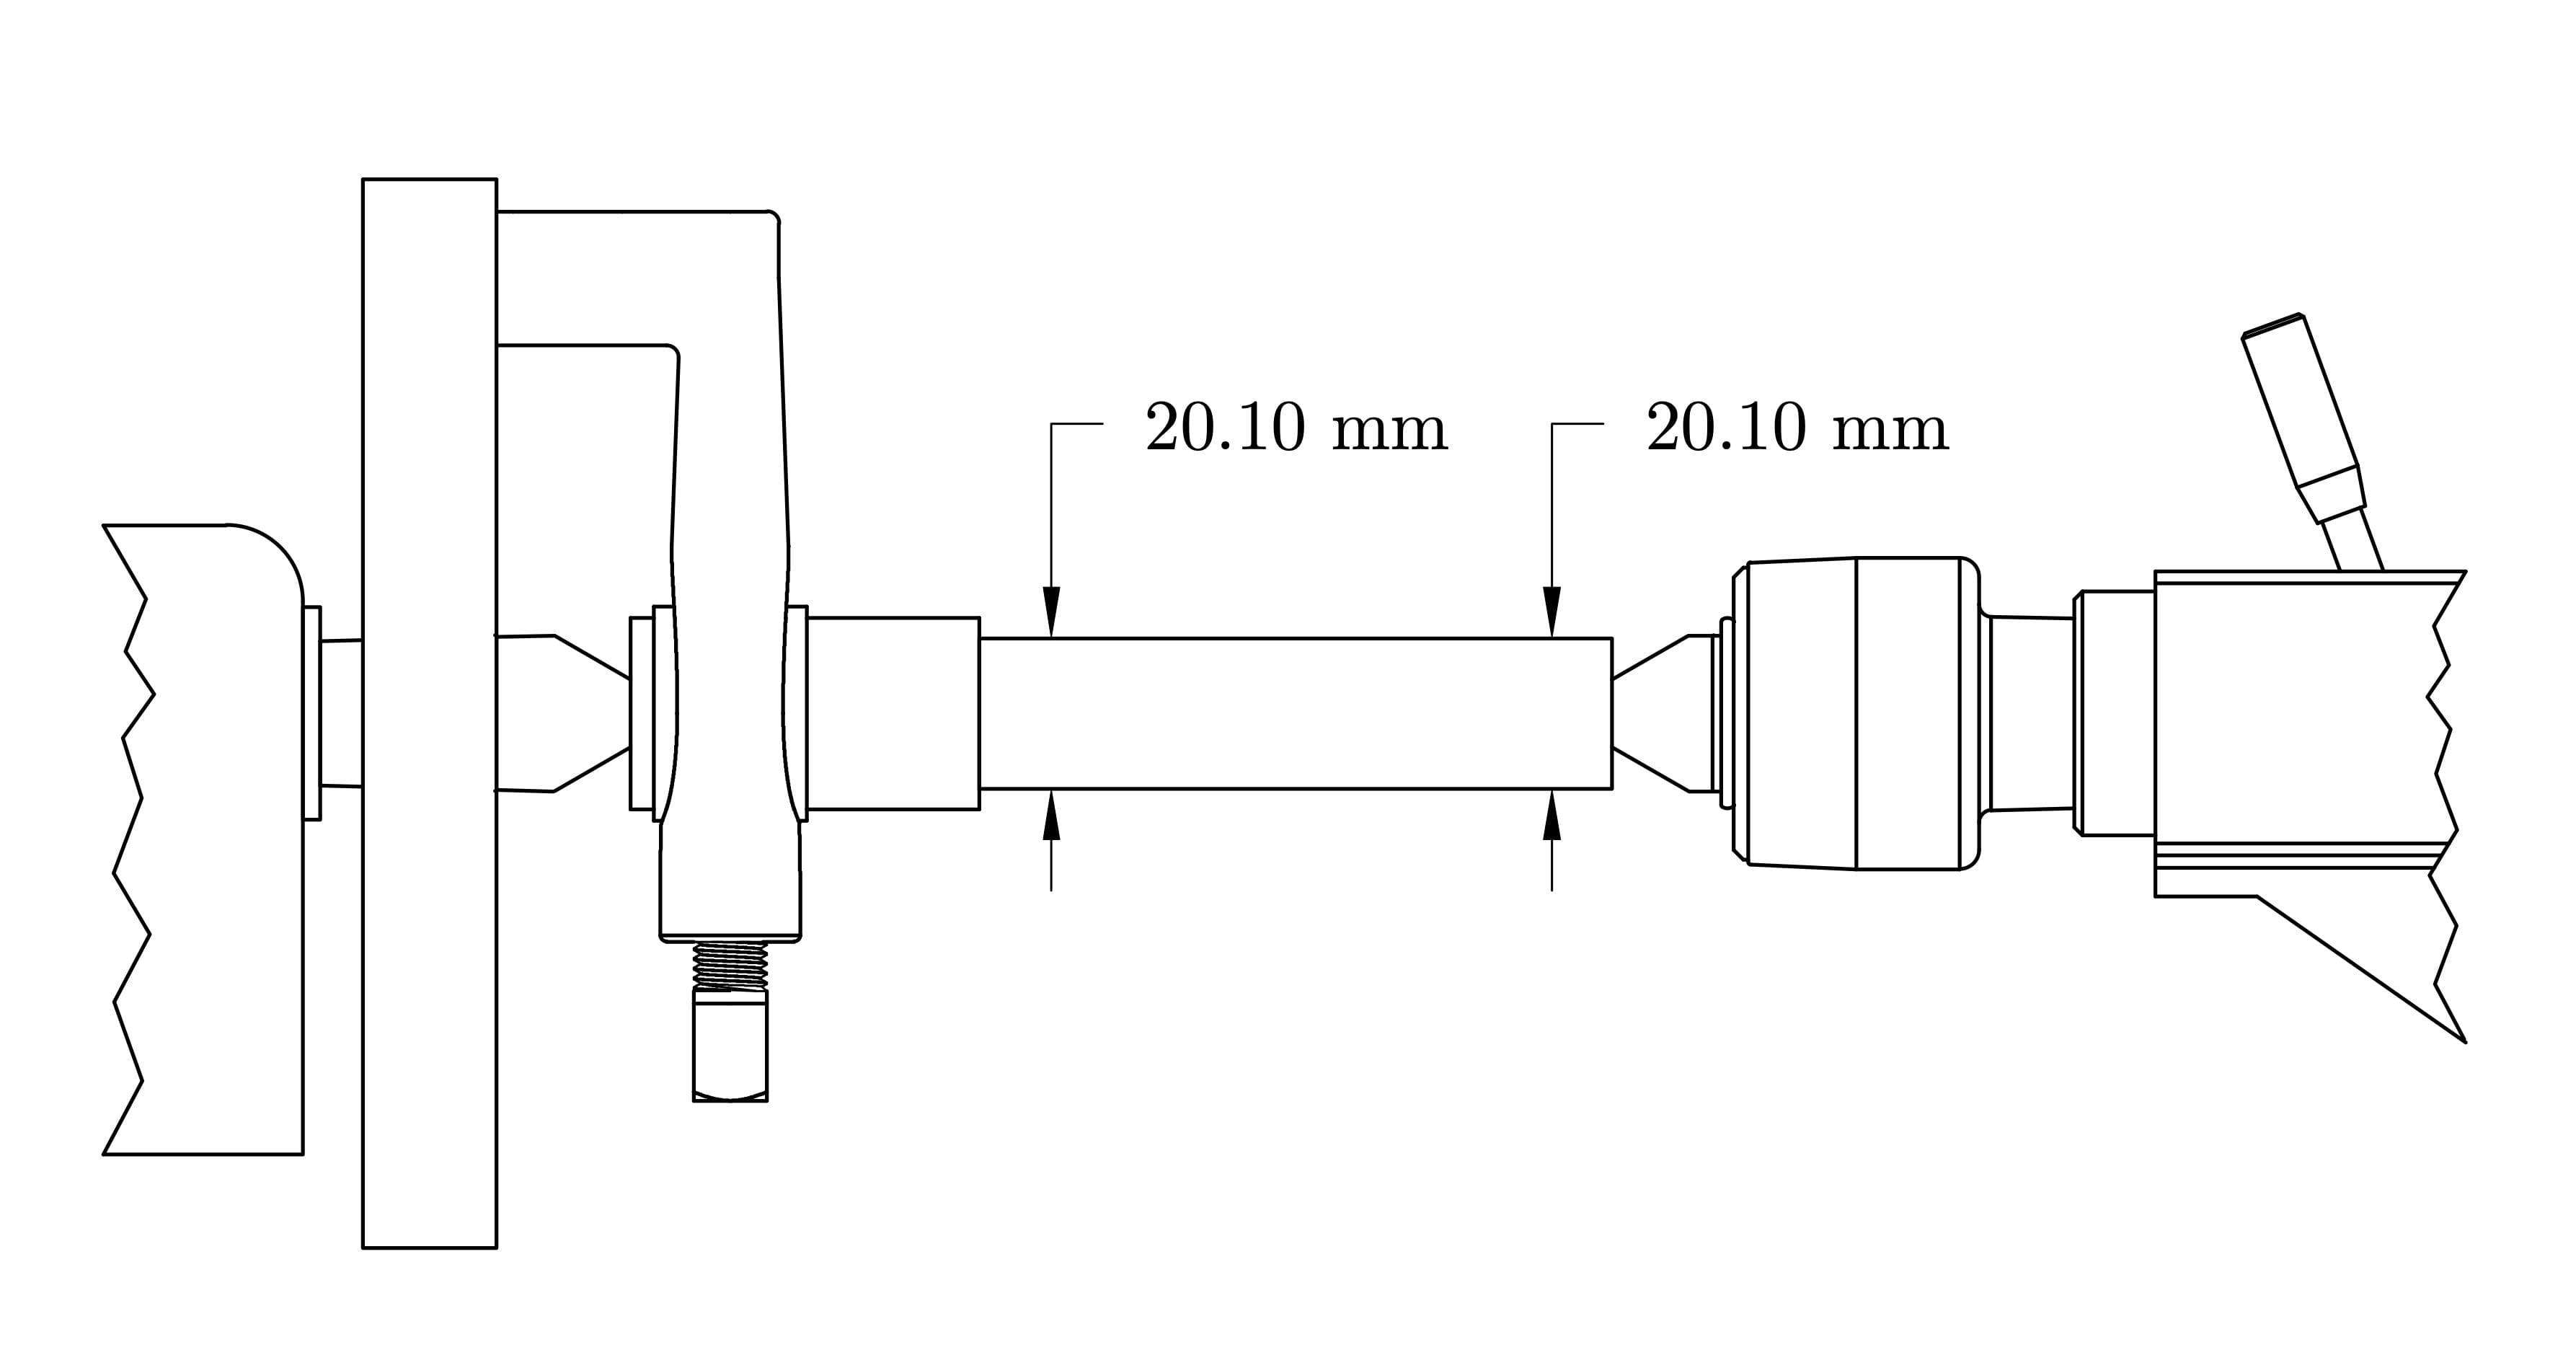
Figure 4.3: Achieving a uniform diameter after center alignment and rough turning.
Precision Turning to Final Dimension (First Side)
- Begin by machining the side that will not be threaded (the thicker part of your workpiece).
- Compare your measured reference diameter with the design specification.
- Compute the amount of material to be removed to achieve the design specification.
- Use the crossfeed dial to set precise depth cuts, ensuring a controlled material removal process.
- Leave a thin allowance for a final finish cut to improve surface quality and accuracy.
- Perform the final finish cut.
- Measure and verify the diameter using a vernier caliper to ensure dimensional accuracy.
Chamfering the Ends
- Set the tool at the required angle for chamfering and ensure it is securely positioned.
- Use the crossfeed dial to measure and control the tool movement, ensuring an even chamfer until it reaches the planned dimension.
- Measure and verify the chamfer dimensions using a vernier caliper to ensure accuracy.
Precision Turning to Final Dimension (Second Side)
- Remove the workpiece and detach the lathe dog.
- Rotate the workpiece and attach the lathe dog to the opposite end. Use a soft metal shim (e.g., aluminum can strip) to prevent damage to the workpiece (see Figure 4.4).
- Repeat the turning process, following the specifications on your plan.
- Perform chamfering on this side as well.
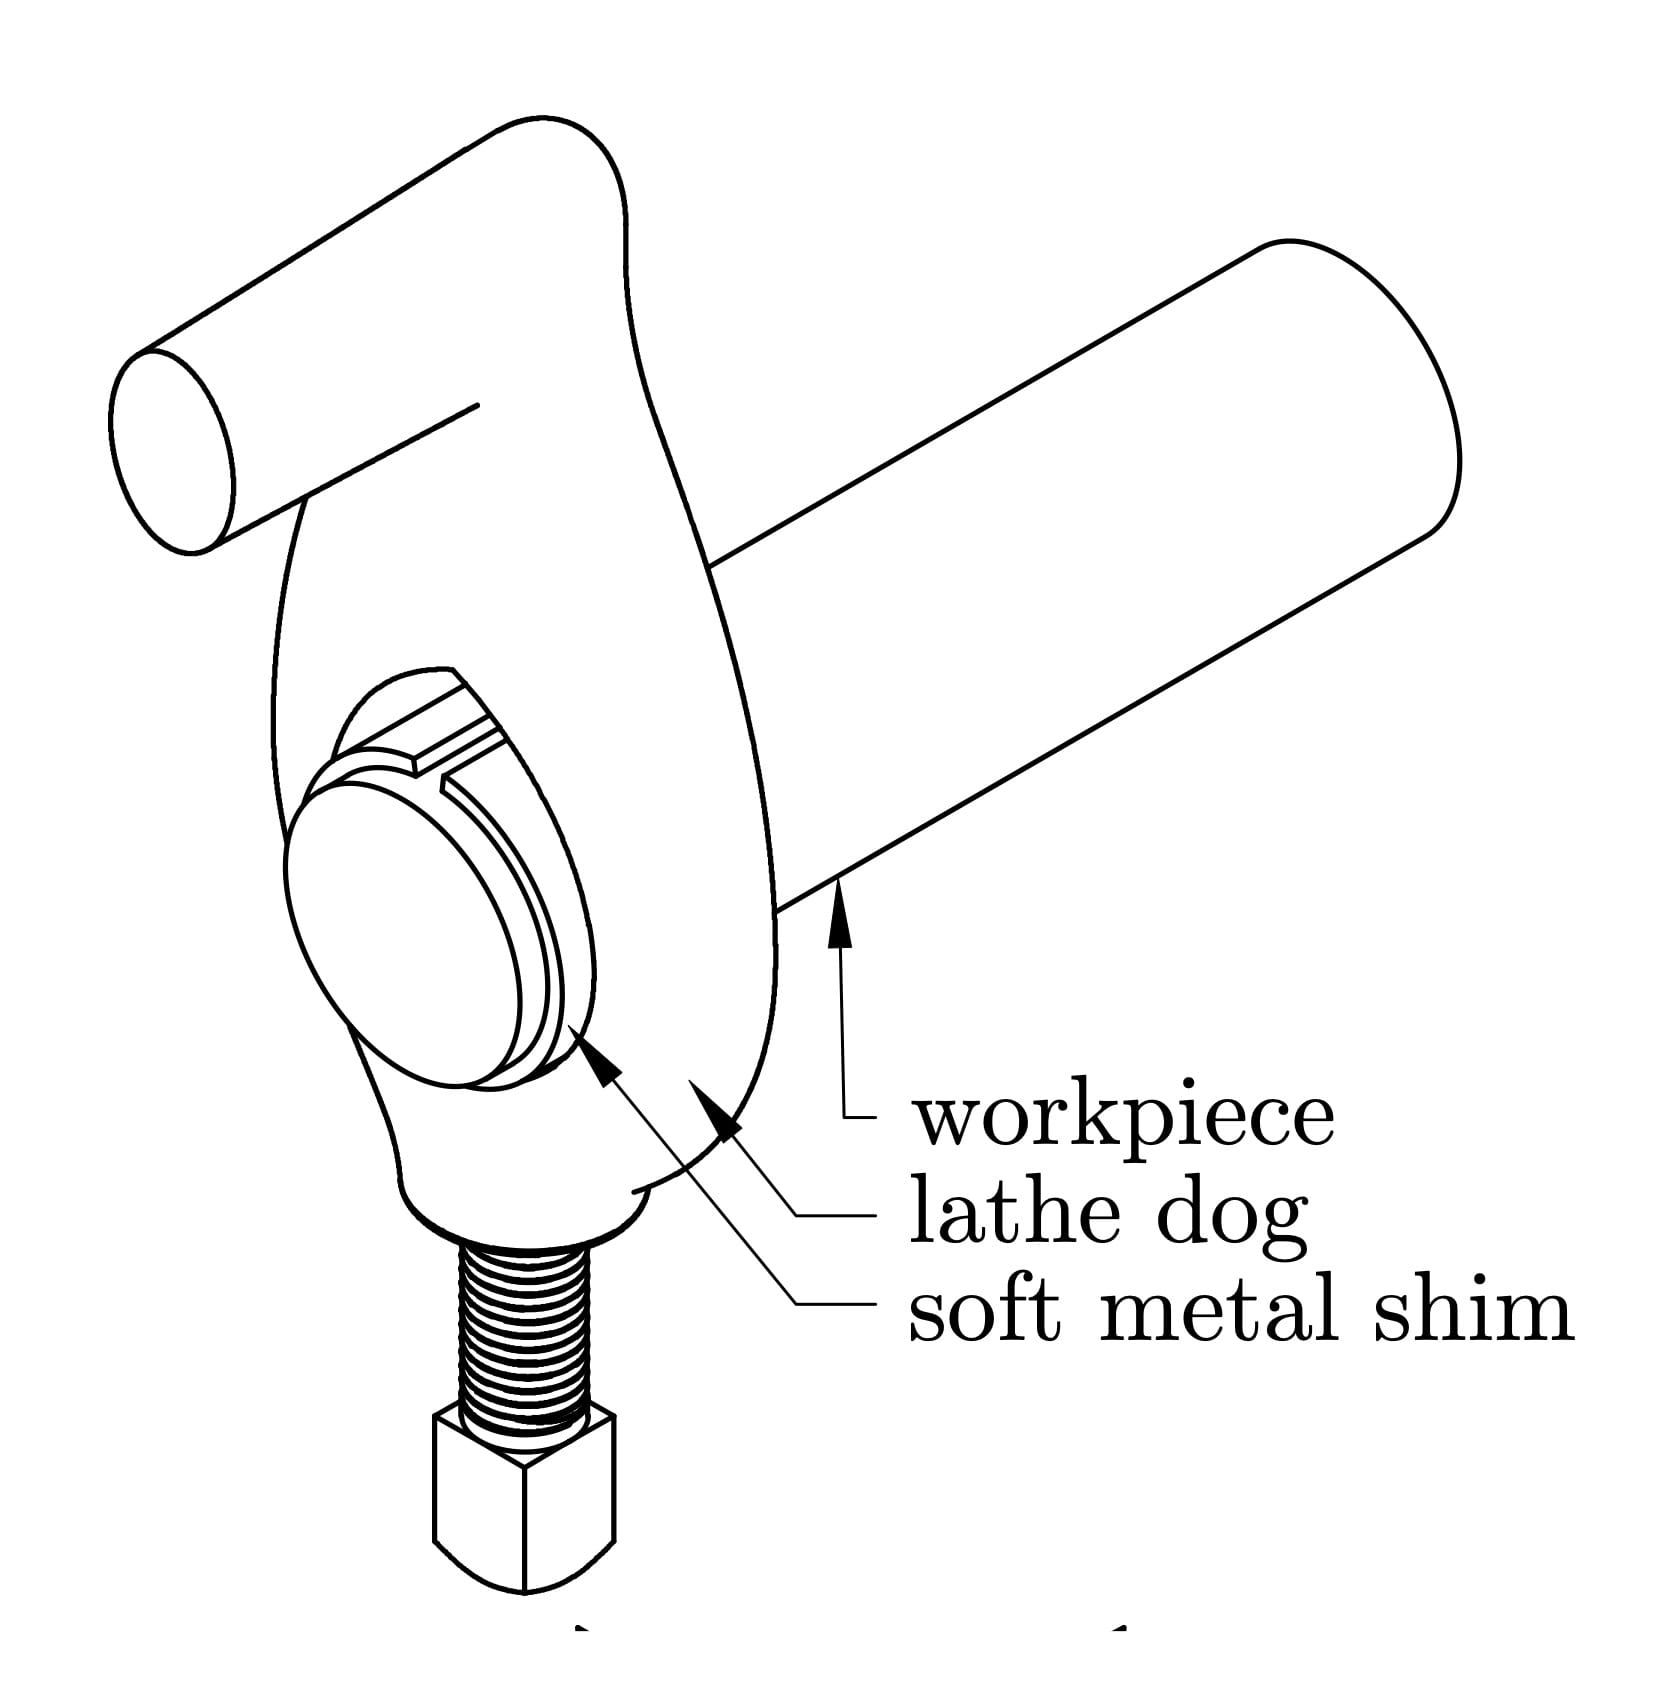
Figure 4.4: Using a soft metal shim to protect the workpiece when securing the lathe dog.
Final Measurements
- Use a Vernier caliper to measure and verify the final dimensions of the workpiece.
- Record the final dimensions and compare them with the project specifications (see Table 4.2 in the Laboratory Worksheet).